Like Day 4 this is another easy day for sewing. I have decided to do a bonus post for this sew along. I will include some things I haven't touched on so far. In the bonus I will show dolly dress with other options with the applique.
Some of you may have struggled with the machine applique so I will introduce you to iron on vinyl, glitter vinyl, using your cricket or other machine similar to cut out stencils, use freezer paper, and fabric paint to create designs. I will also touch on double needles and other fun stuff so I hope you will enjoy this bonus and will try your hand at some of the things I speak on.
Well moving on to the nitty gritty!
Supplies needed for this post:
- Fabric shirt or dress
- Sleeves
- Hem tape
- Sewing Machine
- Thread
- Scissors
- Serger
- Pins or clips
- Chocolate
For this first portion I will be showing everything on the Katy.

{Start by finding your sleeves. My are facing wrong side up.}

{Grab your dress or top pieces you sewn so nicely in Day 4.}

{Fold your sleeve in half right sides together.}

{Find your center and mark with pin or in my case wonder clips.}

{You will push your shoulder seam to the back side of your dress or top.}

{You will start from the center and work your way to the edges. Least that is how I pin.}

{Little photo showing what the sleeve looks like once you have it all pinned in place.}

{Hemming of the sleeve. You will grab your hem tape. It comes in sewable and no sew. Make sure if you plan on stitching anything you get the sewable adhesive. If you get the no sew and try and sew, you will be saying sweet mother of pearl and your sailor side will come out. The adhesive on the no sew will gum up your needle and machine and your stitching will be a hot mess. Please take it from me and learn from my faults. Ain't nobody got time for going through multiple needle replacement during sewing time. Nicole recommends you use 5/8" http://www.joann.com/5%2F8x10-yd-heat-n-bond-lite-adh/13143615.html }

{You need to make sure when you are ironing you are doing the correct temp for your knit and for the adhesive on the heat n bond to stick. Iron it on, then you will pull back the white paper to show the adhesive.}

{Next you will fold up the hem and press in place. If you want to serge the seams before you even apply the heat n bond feel free to do so. I skipped that party I know lazy!!}

{Front View of the sleeve.}

{Next you will take the sleeve to the machine and sew the seam. This is now were you can choose the stitching you'd like. I did zig zag. You can even get out your double needle for a professional finish. If you have a cover-stitch machine I'm totally jealous finish your hem with that. Or if you went with the no sew option then you will skip this part.}

{You will see that sweet molasses my hem is all wonky and not straight and glorious what the heck?!!}

{To fix this go to your ironing board and hit the hemline with steam and like magic....}

{Tada!! It is pretty and lovely. I went with a zig zag stitch feel free to use any stitching you would like. Repeat the process on the other sleeve.}

{I like to hem my sleeves before I sew them into my items. To each their own. This works best for me. I'm working with less fabric when I'm hemming and I produce a better hem. Starting from the center and working to the outside I pin in place.}

{Once everything is nice and pinned you will either sew and then serge or you can choose to just sew and be done.}

{I like to sew with my machine then move and serge. I find I'm able to control the knit better this way. Then if I have issues its far easier to unpick stitching from my machine then my serge edges.}

{Now that I have my stitching I'm finishing my seam.}

{Remember when you serge and you have a curve to slightly stretch the curve straight.}

{Slightly stretching the curve while I serge.}

{Now take a look at your finished sleeve.}

{Taking such great shape and I'm excited to see this all finished.}

{Side view. My fabric choices I'm now second guessing and I'm worried :/ }

{Finishing the bottom hemline. For this you will need to purchase 7/8" heat n bond hem tape http://www.joann.com/7%2F8x10yds-heat-n-bond-lite-adh/13143623.html#q=heat+n+bond&start=1 }

{Again I prefer to sew my hem before stitching up the side. To each their own. I know Nicole stitches her sides first before doing this step. I'm backwards and will be sewing the side seams in Day 6 and showing the neckline finish. So if this confuses you and you prefer to do it how Nicole has stated and demonstrated in her lovely Mac and Katy tutorial please do so. I don't want to make you feel uncomfortable in this sew along. What works for me... might now work for others and that is the wonderful thing about sewing! There are multiple ways to do things and I love finding out what works best for me.}

{You will do the same process for the bottom hem as you did for the sleeve. Take your iron and iron your hem tape to the edge. Again you can choose to serge the edge for a nicer finish or be a lazy bum like me and skip that.}

{Again, push the hem up like so ^^}

{Iron in place. }

{You've got yourself a nice finished edge. Remember if you went with the no sew option you are done at this point after you repeat the process on the other side. If you did the sewable then continue on.}

{I'm odd and I choose to sew from the wrong side up. At this time you can do any stitching you want for your finish. You can pull out your double needle and do a very professional finish. Or again if you have a cover-stitch machine finish your hem with that. I went with just a straight stitch this time.}

{I went with a metallic thread to pull in the silver from the knit. Again I have slight wave at the hem.}

{Grab your iron and steam your knit to straighten it out.}

{Front View: Eekk.. look at that dress. So adorable. Sorry for the side view and making you feel like Night at the Roxberry shaking your head.}

{Back View.}
Mac Up-cycle:

{So your up-cycle is pretty easy you just have to insert your sleeves into the shirt and tada your done!}
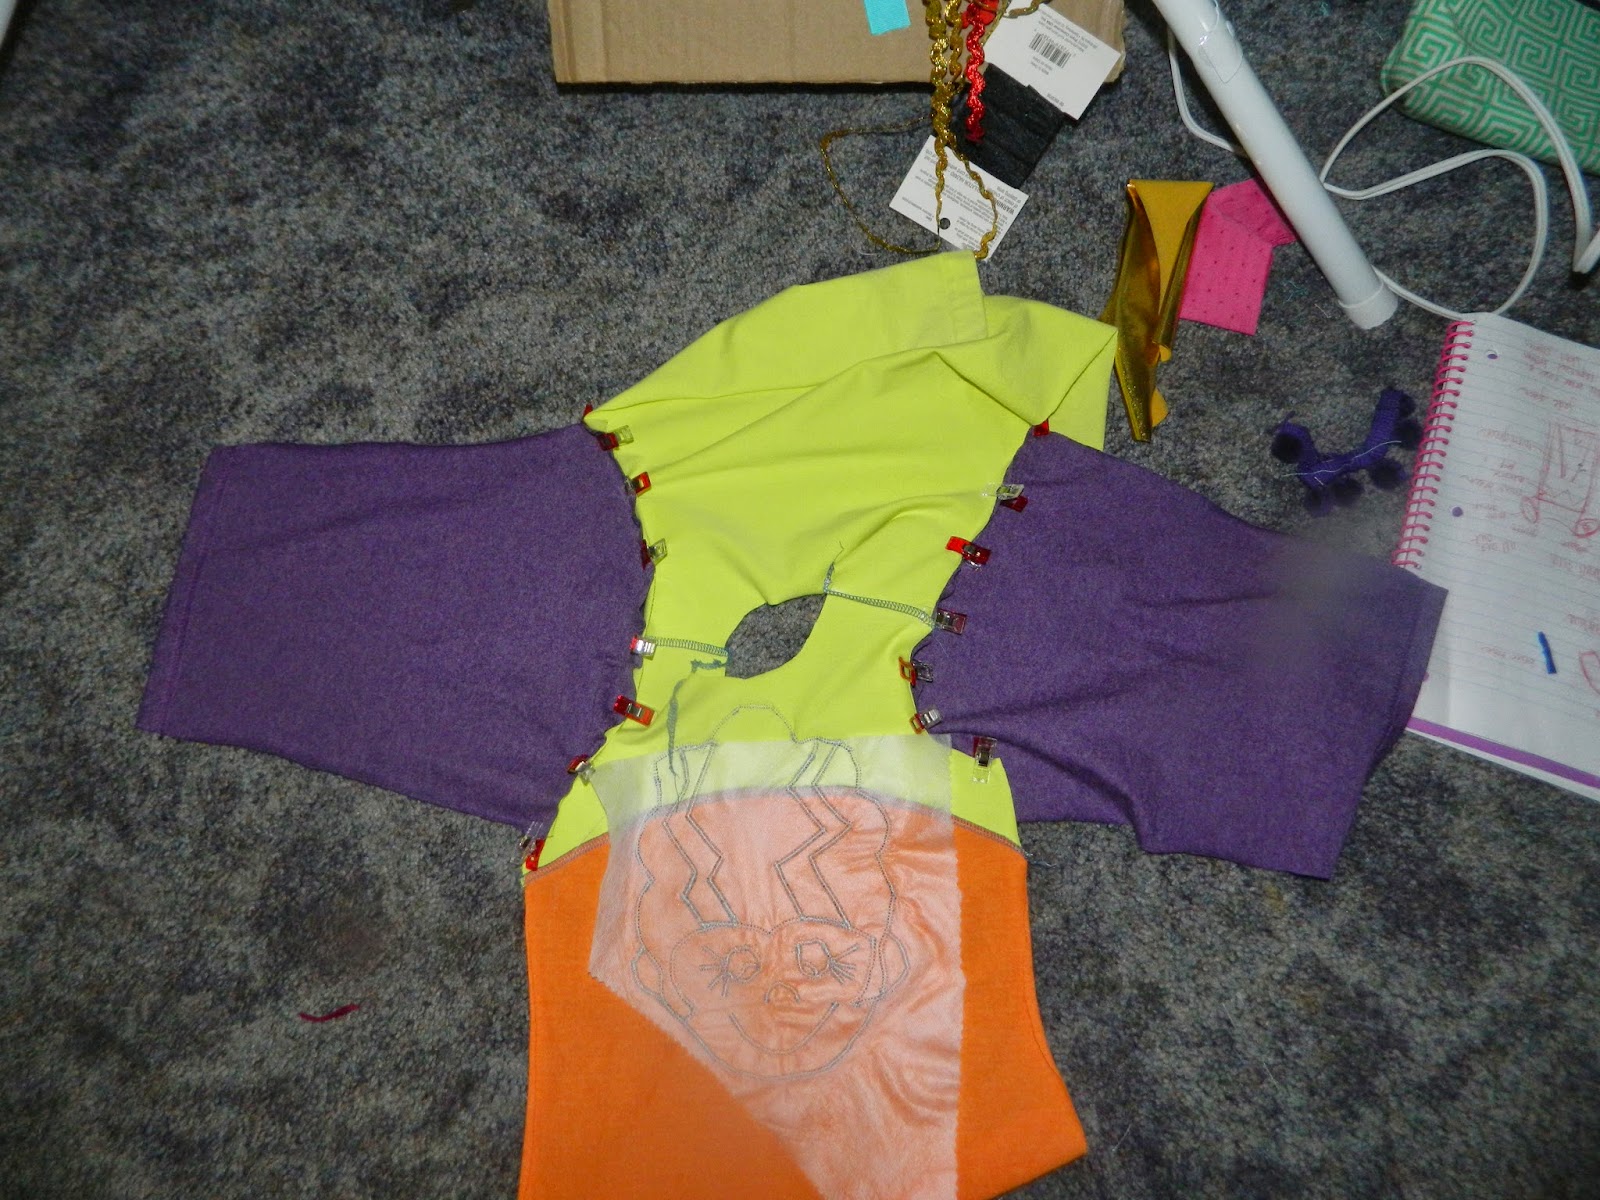
{Pin in place and sew, then serge.}
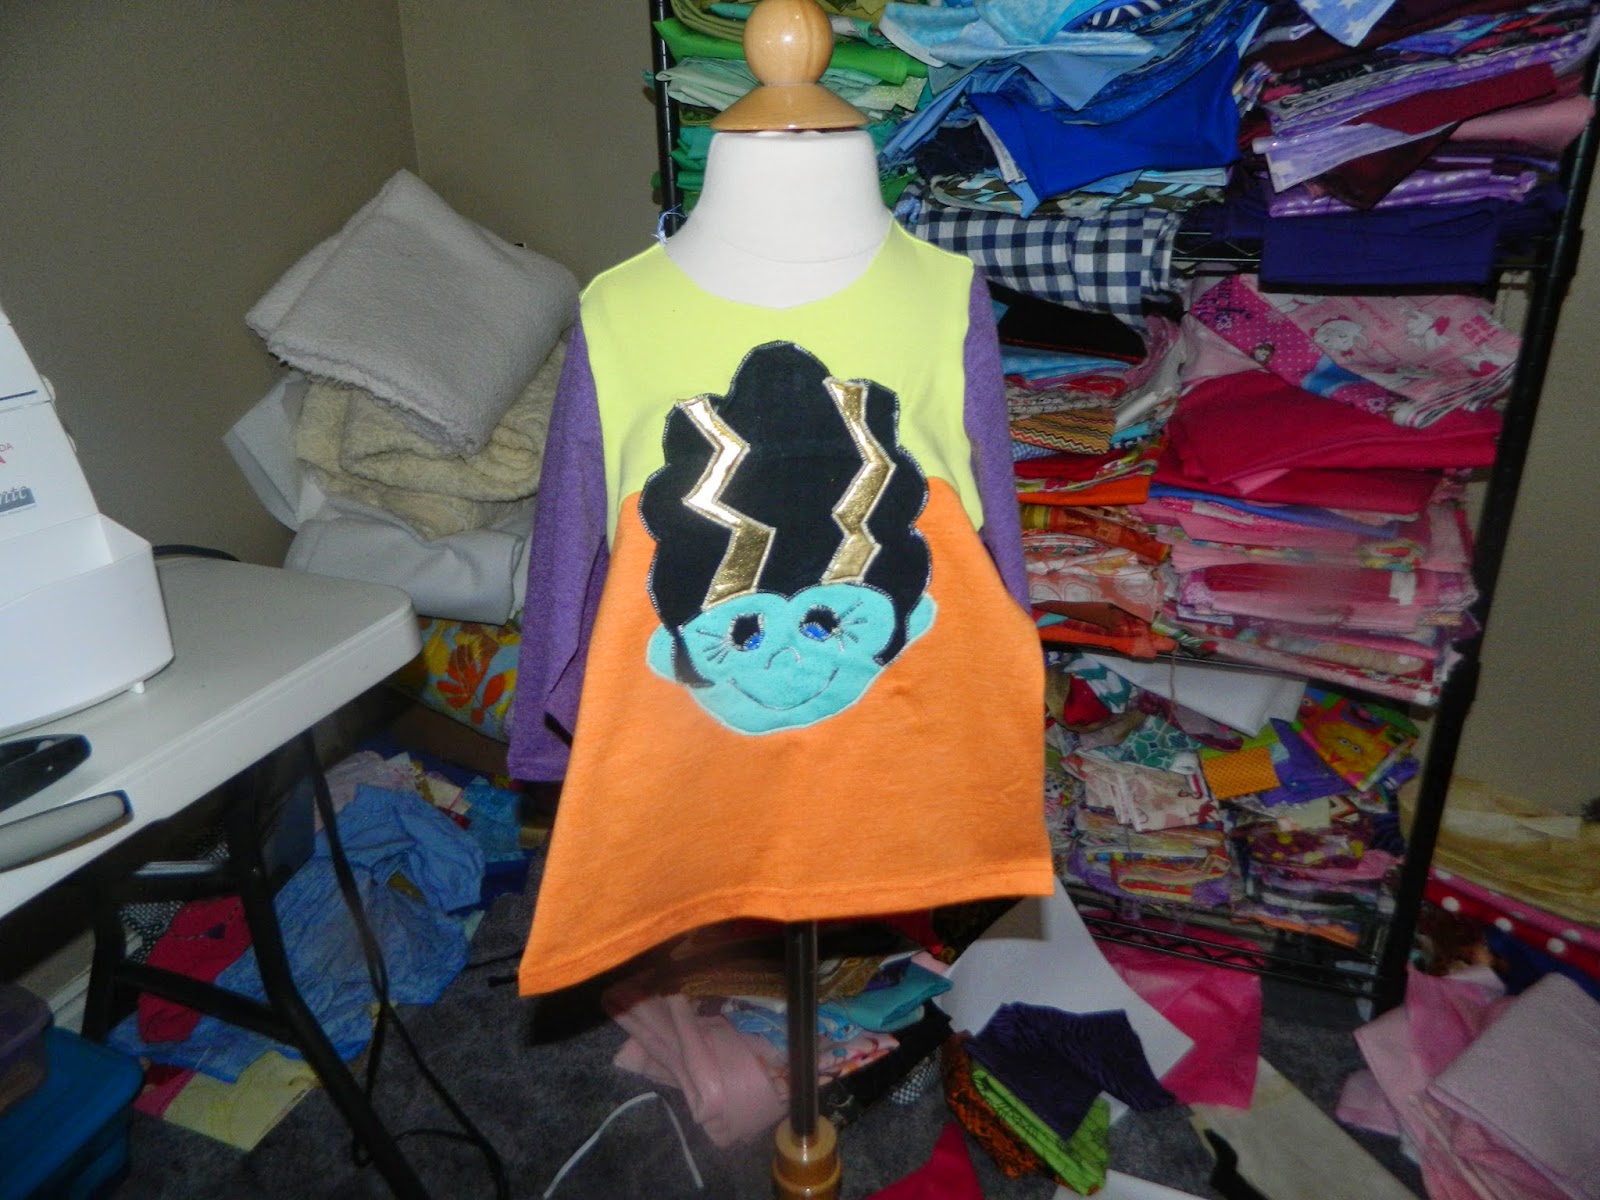
{Look how cute! Lovin' my applique Frankie!!}

{Side view.}
I hope you will continue on the journey. Tomorrow we will sew up the side seams and finish your Katy or Mac with the neckline. Then be on the look out for the bonus post :)
If you have any questions during this sewing please post in the group and I will try to help as best as I can or Nicole or Beth will have a lot more knowledge on aspects I might not have touched on.
XOXO,
~Nicole
No comments:
Post a Comment